The Only Soil Mix You’ll Ever Need for 5-Gallon Bucket Gardening
You’re staring at twenty different bags of dirt – Potting mix? Garden soil? Topsoil? Compost? Every bag promises magic, and all you want is to not kill another tomato.
Good news: one simple mix works for everything. No more second-guessing. No more plant funerals. This guide will show you exactly what kind of soil actually works in buckets, how to mix it yourself if needed, and how to avoid the mistakes that sabotage good plants.
The Gardening App that Thinks Ahead,
so you’re never behind
Never forget another gardening task or get blindsided by bad weather and pests again. Growing made Easy

Key Points
- Never use ‘garden soil’ in a bucket (it turns into concrete)
- The best potting mix for container gardening = 3 parts potting mix + 1 part compost
- Pre-moisten before filling buckets to avoid watering headaches
- Use the 2-inch rule: don’t fill to the top
- DIY potting mix is doable, but you can also just buy a good brand and move on
Stop Overthinking It: The One Mix That Works

If you only take away one thing, remember this:
3 parts potting mix + 1 part compost. That’s it.
This is the gold standard for bucket gardening. It gives you:
- Drainage (so roots don’t drown)
- Moisture retention (so you don’t water daily)
- Slow-release nutrients (so plants grow strong without burning)
Don’t get distracted by words like “topsoil” or “moisture control blend” or whatever buzzwords are on the bag. If it’s labeled garden soil or topsoil, put it back.
Garden soil is made for the ground. In a bucket, it compacts, holds water too long, and suffocates your plants.
Why This Mix Works (And What Happens If You Don’t Use It)
Potting mix is built for containers. It usually includes peat moss or coconut coir (which hold moisture without getting soggy) and perlite or similar materials that keep things light.
Compost adds fertility. It slowly feeds your plants, introduces beneficial microbes, and improves structure over time.
The combo does everything your plant needs.
What happens if you use the wrong stuff?
- Garden soil turns to mud, then to bricks
- Bargain mixes are full of wood chunks that steal nutrients
- Cheap soil holds too much water or not enough

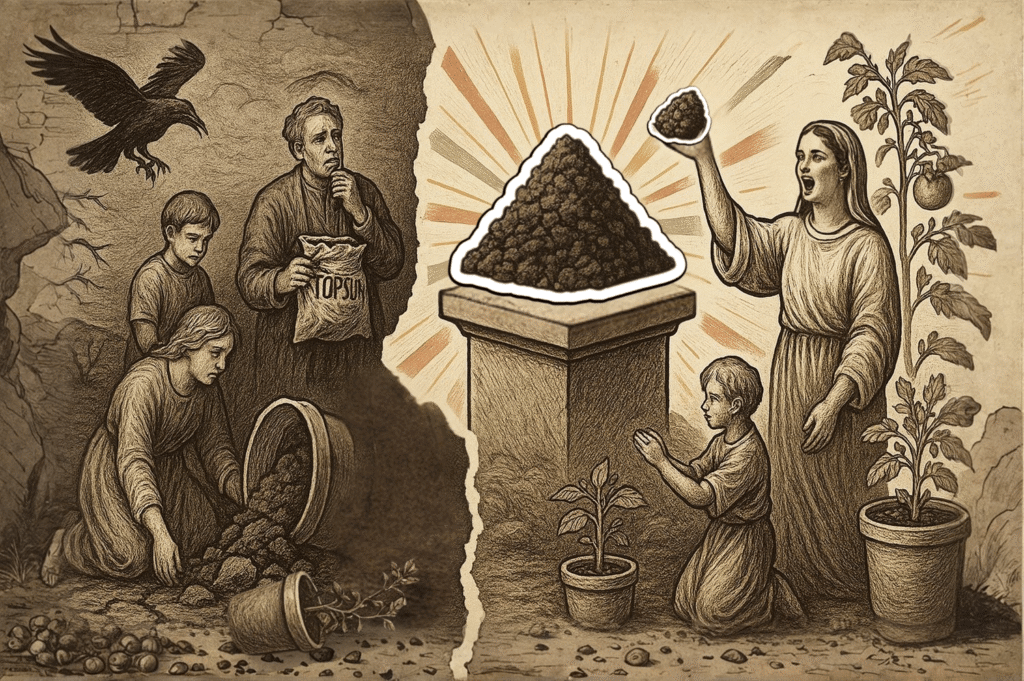
This visual compares garden soil to a DIY potting mix, highlighting why the best potting mix for container gardening creates fluffy, moist conditions for strong root growth — while dense soil leads to stunted plants and dry buckets.
Real-World Soil Fails (And What to Do Instead)
You water your bucket and the water just sits on top. The soil beads up, slides to the edge, and drains down the side. That’s because dry potting mix resists water.
You water your bucket and it all pours straight through. No retention, no absorption — just wasted effort. That usually means the mix was too loose or missing compost entirely.
You filled the bucket to the top, watered once, and now half the soil is gone. That’s a structure issue and a placement issue. Buckets need the 2-inch headspace.
These are simple mistakes. Easy to fix. But they’ve probably made you question if you can grow anything at all. You can. You just need a setup that works.
Related Guides
How to Fill Your Buckets Right (Most People Mess This Up)
Even if you buy the perfect potting mix for container gardening, you can still ruin your setup if you don’t use it right. Here’s how to avoid that.

This step-by-step shows how to layer potting mix for container gardening using a simple DIY potting mix — from lining the bucket to pre-moistening, filling to the 2-inch mark, and tapping it gently to settle.
4 Steps
1. Use a Coffee Filter or Newspaper First
Lay this across the bottom of the bucket before filling. It keeps soil from leaking out the drainage holes without blocking water.
(No, you don’t need rocks. That’s a myth.)
2. Pre-Moisten the Mix
Dry mix repels water. That’s why your first watering often runs straight off the top.
Instead:
- Dump the potting mix and compost into a wheelbarrow or tote
- Add water a little at a time
- Mix until it feels like a wrung-out sponge
This step makes everything easier. Water soaks in evenly. Roots settle faster. You’ll thank yourself later.
3. Follow the 2-Inch Rule
Fill the bucket to about 2 inches below the rim. That gives you room for:
- Proper watering (without overflow)
- A mulch layer later
- Root expansion as the plant matures
4. Don’t pack it down. Just tap the sides to settle it, then top it off.
Common Soil Mistakes (That Nobody Explains)

This comparison shows why leaving 2 inches of space at the top helps prevent water runoff — and ensures your DIY potting mix actually retains moisture and supports root growth.
❌ Buying Bargain Soil
That $2 bag of topsoil? It’s probably full of junk: bark, wood chips, weed seeds, no nutrients. You’ll spend more money replacing dead plants than if you’d just bought quality to begin with.
❌ Reusing Old Soil Without Refreshing It
Last year’s soil is tired. It needs help. Remove the top few inches (where problems build up), and mix the rest with equal parts fresh potting mix and compost.
❌ Overfilling Buckets
If you fill to the top, soil will spill when you water or move the bucket. Plus, there’s no room for mulch. Stick to the 2-inch rule.
❌ Ignoring Soil Temperature
Stick your wrist 3 inches into the soil. If it’s cold, wait. Warm soil = fast root growth. Cold soil = plant struggle. Be patient.
DIY Potting Mix (If You Want to Save Money)
If you’re up for it, you can make your own:
- 1 part peat moss or coconut coir
- 1 part compost
- 1 part perlite or vermiculite
Mix thoroughly. This gives you a light, nutritious base that drains well. It’s not fancy, but it works. Store-bought is still fine while you’re learning, so don’t overcomplicate it.
What to Do This Week
Let’s move from thinking to doing.
✅ Step 1: Grab Your Soil Supplies
Pick up one big bag of potting mix and one bag of compost. That’s it. Skip the extras. The 3:1 mix works — no overthinking required.
✅ Step 2: Mix Right in the Bucket
Use your bucket as your mixing bowl. Add 3 scoops of potting mix, 1 scoop of compost, and a bit of water as you go. Mix with your hand or a trowel until it feels like a damp sponge. Good enough is good enough.
✅ Step 3: Fill to the Right Height
Line the bottom with a coffee filter or newspaper. Fill the bucket to about 2 inches below the rim. Don’t pack it down — just tap the sides to settle the mix.
✅ Step 4: Water Once and Let It Be
Give it a solid first watering. That’s all for now. You don’t need to babysit it — just check in once a week and let the system do what it’s built to do.
The Bottom Line
Don’t let the soil aisle keep you stuck.
You don’t need to become a soil scientist. You just need a simple system that works in buckets and fits into your actual life.
One good soil mix. One filled bucket. One plant grown well.
That’s where it starts.
FAQ: Soil Edition
External Resources
- Virginia Cooperative Extension: Vegetable Gardening in Containers
Explains why garden soil fails in containers and emphasizes using a lightweight potting mix for container gardening. Offers clear, research-backed guidance on DIY soil preparation, compost use, and how to properly fill containers like 5-gallon buckets. - USDA People’s Garden: Container Gardening
Covers USDA tips for setting up container gardens with safe materials, drainage, and the best potting soil mix for vegetables. Reinforces the importance of combining quality potting mix and compost for successful food production in containers. - National Agricultural Library (USDA): Raised Beds & Container Gardening
Highlights the role of nutrient-rich potting media and sunlight in container gardening. Useful for understanding how to manage soil in 5-gallon buckets, with special attention to compost, drainage, and moisture retention in potting mixes. - US Composting Council: How-To Garden Guides
Outlines best practices for using compost to improve fertility in both DIY potting mix and pre-made container blends. Great companion resource for learning how compost enhances structure, aeration, and water retention in container soil. - USDA ARS: Tips for Healthy Soil in Your Backyard Garden
Backs up the value of compost in improving soil for container gardening, including raised beds and bucket systems. Includes actionable tips for using compost to boost structure, drainage, and nutrient availability in any potting mix. - USDA National Organic Standards Board: Production Standards for Terrestrial Plants in Containers (PDF)
Defines approved ingredients for organic potting mix in container systems. Ideal for those interested in DIY potting mix for 5-gallon buckets who want to stay within certified organic standards for compost and soil components. - University of Maryland Extension: Growing Media (Potting Soil) for Containers
Breaks down what makes the best soil mix for container gardening — and why native soil shouldn’t go in pots. Offers specific compost and potting media ratios that align with what works in 5-gallon buckets and other container setups.